
HOW DO YOU MOUNT A SCOPE ON AN AR-15?
Optics are an important part of a modern weapons system. Once derided as too fragile for general use, the last couple of decades in Iraq and Afghanistan have taught us that optics can survive day-to-day use and abuse. Even the Marine Corps, long enamored with iron sights, has seen the value of magnified optics and now provides them as a general issue item.
Magnified optics (aka “scopes’) are now on AR-15 rifles of all types. From long-range precision rifles to hunting rifles to do-it-all, multi-purpose guns…even CQB-oriented rifles are now sometimes equipped with low-powered variable optics (LPVO). A scope can increase your hit potential by upping your accuracy. A scope can also make it easier to observe the target – a good thing whether you are a tactical shooter or hunter.
All of SOTA Arms’ AR-15s are equipped with a flattop upper for ease of mounting an optic. Mounting a scope can be a little tricky, though. Today we are going to take a look at mounting a scope, including choosing your scope and mount, what tools you need, and the actual mounting. Let’s get into it!
Types of Scopes and Mounts
It should probably go without saying, but before you begin mounting your rifle scope you will obviously want to choose your scope. The rifle’s application will have a lot to do with that; it wouldn’t make much sense to put a 12-power scope with a huge objective lens on a 10.5” AR pistol. It also probably wouldn’t be fitting to put an LPVO on a 24-inch varmint rifle. It’s up to you to know your rifle’s purpose and choose a scope accordingly, but there is a quick rundown of the most common types of scopes.
Red Dot Optics: Though not actually telescoping and not technically “scopes,” this is perhaps the most common type of optic for AR-15 rifles. These optics are 1-power or zero magnification and are meant for fast, close-in work. Mounting these is simple as they already have a built-in mounting base that attaches to a Picatinny rail.
Uses for Red Dots: Home defense rifles, CQB carbines, short-range hunting.
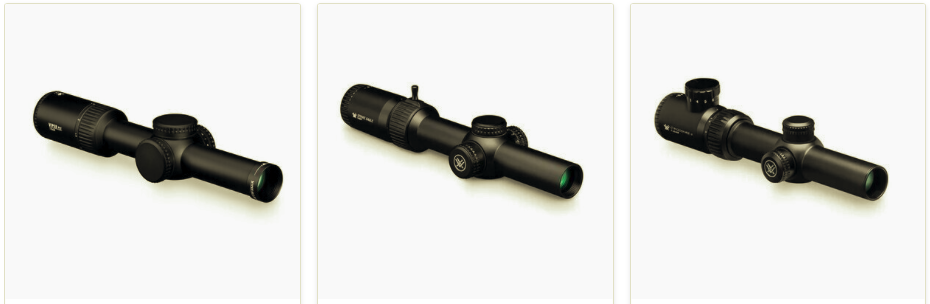
Low-Powered Variable Optics (LPVO): This type of optic typically has a very low magnification setting, typically 1x (zero magnification) or 1.5x for fast, close work, and features rapidly changeable magnification up to about 4x or 6x. These scopes are incredibly versatile and are rapidly gaining popularity as the tactical scope du jour. The LPVO offers maximum versatility.
Uses for LPVO: Patrol rifles, do-it-all rifles, brush guns, and general-purpose tactical rifles.
Traditional Riflescopes: Traditional riflescopes come in either fixed or variable power and usually offer higher magnification. Variable-power scopes are very popular today, on everything from ARs to bolt-action rifles, with 3x-9x being the typical range of magnification. These do have the disadvantage of larger lenses, meaning they must be mounted higher above the rifle’s bore.
Uses for Traditional Riflescopes: Hunting, long-range target shooting, tactical marksmen. Your purpose for having a scope will largely dictate the type of scope you choose. Another guiding factor will be the cost, but there are options ranging from affordable to top-of-the-line in all of these categories. There are also several other categories of niche scopes, but these are the mainstays.
Types of Mounts
Since you can’t mount a scope without mounts, let’s look at them too. The different types of optics mentioned above take different types of mounts. You don’t have to go all-out pricewise to get a decent mount, but you should buy quality; if your scope isn’t securely mounted your accuracy will suffer. As mentioned, most red-dot optics have a built-in mount and nothing more is required..
LPVO optics often mount in what is known as a “one piece” mount. These mounts consist of a solid, one-piece base that includes the bottom halves of the scope rings built in. The basic steps to using a one-piece mount are to first mount it to the rifle’s rail and remove the top rings. Then scope is set in the bottom piece, and the top halves of the rings are placed over it and tightened, securing the optic. One-piece mounts range in price from $50 to close to ten times that.
Traditional riflescopes usually mount in scope rings. These are rings that clamp around the scope, one near the objective lens, and one near the ocular lens (the lens closest to the shooter’s eye). Scope rings are typically two-piece affairs with a bottom portion that mounts to the gun’s rail or scope mount, and a top portion that secures the scope. One important factor when choosing scope rings is the diameter of the scope’s tube. This number is usually expressed in millimeters with 30mm and 40mm tubes being very common. Make sure you choose rings that match your scope.
Tools You Need for Scope Mounting
You will need some tools to mount your scope. Having the right tools will make the mounting process go much more smoothly.
- Gun Vice: You need something to hold your AR platform during the mounting process. It should be stable, and it should hold the gun level.
- Torque Wrench: you need to tighten screws to fairly precise in-lb measurements, not just “finger tight.”
- Bubble Level: if your scope is not level your adjustments won’t correlate to real-world impact. A level is necessary to level your scope so that the reticle is a truly vertical line bisected by a truly horizontal line.
- Thread Locker for locking screws in place.
How to Mount a Scope
- At this point you have your new scope and mount in hand. You have gathered your tools, and you have some distraction-free time to work with. At this point you need to make sure you rifle is unloaded. Once you have done this, set the rifle in the vise, or whatever else you are using to secure it during the mounting process. If you are mounting a traditional riflescope or LPVO, flip down your rear sight (or remove it if it is a fixed rear)
- From here, add the mount or the bases of the scope rings as far to the rear as possible on your upper receiver. If you are using a one-piece mount, you only have one item to secure to the Picatinny rail; with traditional scope rings, you have two. This will usually require tightening a couple of bolts on one-piece mounts and one each on traditional rings. At this point, you only want to loosely tighten them because we will still probably have to adjust for eye relief.
- Now, remove the top rings. This will require removing the screws that hold them in place. Once the top rings are removed, set the scope in the bases. Position it so that the rings aren’t touching either of the lenses or the adjustments; the rings should only be contacting the scope’s tube. Now set the top rings on and loosely tighten them. Before we begin tightening stuff down, we need to verify proper eye relief.
- Eye relief is how far the ocular lens is from the shooter’s eye. Before torquing the mount or rings down, you want to check for proper eye relief. This varies, optic-to-optic, but you want to make sure that your eye is the correct distance from the ocular lens and does not have “scope shadow”.
- The next step is to get behind the gun and assume a proper cheek weld. You will want to hold the gun in the position it is most likely to be used in; feel free to steady it as needed. If the scope is touching your face, it obviously needs to be moved forward. You can loosen the rings and move the scope within the rings. If you hit a hard limit, you may have to remove the rings from the upper receiver and move them forward a position or two.
- Once eye relief is correct, tighten the base(s) down. Follow the manufacturer’s instructions for getting it to the correct tightness. Before tightening the rings, we still have one more step: leveling everything up. Before we can level the scope, we have to make sure the rifle is level. This can be difficult, but you can set your bubble level on the handguard as you work to get it level. Once the rifle is level, set the bubble level on the scope’s top adjustment knob. Now you can tighten down the scope ring screws, preferably with a torque driver to ensure you don’t over- or under-tighten.
- The final step in the scope mounting process is to apply thread locker to all ring screws so they don’t back out and loosen over time and under recoil. Don’t remove everything, remove one screw at a time, apply thread locker, and replace it, so you don’t undo the hard work of leveling and finding correct eye relief.
Final Thoughts
Mounting a scope isn’t all that difficult, but it does require time, focus, and patience. Take your time, use quality components, and use the right tool for the job. This makes your optic and mount live up to the SOTA Arms AR-15 they are mounted on.
SOTA Arms AR15s are some of the best in the industry. Each one of our rifles – from our Guns of Color in 5.56 to our complete upper units in calibers from 6.8 Grendel to .300 Blackout to 7.62x39 to .458 SOCOM are all built with precision and top-quality parts. Each rifle and upper is built quality you can bet your life on.


